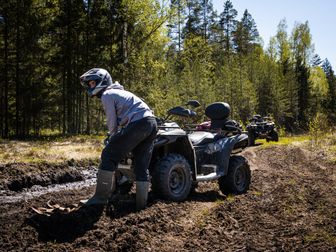
ATV Won't Start? The Complete Troubleshooting Guide for Common Causes

Salem Hassan founded Travelcamp RV and brings 30+ years of hands-on RV, marine, and powersports experience to every review.
✎ Reviewed by Salem Hassan — Founder, Travelcamp · 30+ years in RV, marine, and powersports
Why trust us
BestATVTrails trail guides are researched by riders with decades of powersports experience. Our lead researcher spent 30+ years in powersports retail and has ridden trails across a dozen US states. Every gear recommendation is sourced from real product research matched to specific terrain — not paid placements or generic affiliate lists.


If your machine suddenly refuses to fire, this atv won't start troubleshooting guide will help you narrow down the problem without guessing. In our research at BestATVTrails, most no-start issues come down to a handful of systems: battery power, fuel delivery, ignition, air, or safety interlocks. The key is to work through them in a calm order instead of replacing parts at random.
Whether your ATV clicks once, cranks slowly, turns over but never starts, or does absolutely nothing when you hit the starter, the symptoms usually point toward a specific failure. Below, we break down what to look for, the most likely causes, and the fixes we recommend before you load it onto a trailer.
What's Going Wrong

An ATV that won't start usually falls into one of a few symptom patterns:
- No response at all: You turn the key or press the starter and get nothing. This often points to a dead battery, blown fuse, bad connection, or safety switch issue.
- Clicking but no crank: The starter solenoid clicks, but the engine does not turn over. This usually suggests weak battery voltage, corroded terminals, or a failing starter circuit.
- Cranks but won't fire: The engine turns over normally but never starts running. This often means a fuel, spark, or air problem.
- Starts hard when cold: It may eventually start after repeated attempts. We researched this pattern and found it commonly tied to stale fuel, a dirty spark plug, weak battery output, or carburetor issues.
- Starts then dies immediately: This can happen when fuel flow is restricted, the choke is misused, or the machine has a sensor or idle-related issue.
It also helps to note when the problem began. If the ATV sat for weeks or months, stale fuel and battery discharge move to the top of the list. If it quit after a muddy ride or pressure wash, wet electrical connections and clogged intake components become more likely. If the issue appeared right after accessory installation, we recommend checking fuses, grounds, and battery leads first.
Root Causes
Dead or Weak Battery
A weak battery is one of the most common reasons an ATV will not start, especially after storage, cold weather, or repeated short rides. Even if lights come on, there may not be enough amperage to crank the engine.
Dirty or Loose Electrical Connections
Battery terminals, ground points, fuse holders, and starter wiring can corrode or loosen over time. That creates resistance, voltage drop, and intermittent no-start behavior.
Fuel Delivery Problems
If the engine cranks but never catches, fuel may not be reaching the combustion chamber. Common culprits include stale gas, a clogged fuel filter, a blocked petcock, contaminated fuel, or a gummed-up carburetor.
Spark Plug or Ignition Failure
An ATV needs a strong spark at the right time. Fouled plugs, damaged plug caps, bad coils, or ignition component faults can stop combustion even when the engine cranks normally.
Air Intake or Flooding Issues
Too little air, too much fuel, or an overused choke can prevent starting. A soaked air filter, blocked intake, or flooded cylinder can all create hard-start or no-start conditions.
Safety Switch, Starter Solenoid, or Starter Motor Fault
Many ATVs have neutral, brake, tether, or kill switch interlocks. If one fails, the machine may act completely dead. In other cases, the solenoid or starter motor itself may be the failed component.
Step-by-Step Fix

Dead or Weak Battery
Tools/parts needed: Multimeter, battery charger or maintainer, wire brush, terminal cleaner, replacement battery if needed
- Check battery voltage with the ATV off. A healthy fully charged 12V battery should usually read around 12.6 volts or slightly higher.
- Test voltage while cranking. If it drops sharply below normal starting range, the battery may not have enough reserve power.
- Inspect the terminals. Look for white or green corrosion, loose bolts, or frayed cable ends.
- Clean the terminals. Disconnect the negative cable first, then the positive. Clean both posts and cable ends with a wire brush.
- Recharge the battery fully. After charging, retest voltage and attempt to start the ATV again.
- Replace the battery if it will not hold a charge. If the battery is old, swollen, or repeatedly weak after charging, replacement is usually the better fix.
Dirty or Loose Electrical Connections
Tools/parts needed: Socket set, screwdriver set, dielectric grease, contact cleaner, spare fuses, multimeter
- Inspect the main battery cables. Make sure both positive and ground cables are tight and free of damage.
- Check the frame ground. A loose or rusty ground point can mimic a dead battery.
- Inspect the fuse box. Remove and visually inspect the main fuse and starter-related fuses.
- Clean suspect connectors. Use contact cleaner on accessible plugs around the battery, ignition, and starter circuit.
- Apply dielectric grease lightly. This helps protect cleaned connectors from moisture and corrosion.
- Retest for power at the starter circuit. If power is reaching the solenoid but not the starter, the fault is farther downstream.
Fuel Delivery Problems
Tools/parts needed: Fresh fuel, drain pan, fuel line pliers, replacement fuel filter, carburetor cleaner, shop rags
- Confirm there is actually fuel in the tank. It sounds obvious, but inaccurate gauges and steep parking angles can mislead riders.
- Smell and inspect the fuel. Old gas often smells sour or varnish-like and may appear darker than fresh fuel.
- Drain stale or contaminated fuel. Refill with fresh fuel from a clean source.
- Check the fuel valve or petcock. Make sure it is on and flowing properly.
- Inspect fuel lines and filter. Look for kinks, cracks, clogging, or collapsed hoses.
- If carbureted, clean the carburetor. A stuck float or clogged jet is common after storage. We recommend a proper cleaning rather than dumping in additives and hoping for the best.
- If fuel-injected, listen for the fuel pump prime. No pump sound may indicate a fuse, relay, pump, or wiring issue.
Spark Plug or Ignition Failure
Tools/parts needed: Spark plug socket, gap tool, replacement spark plug, insulated pliers, service manual
- Remove the spark plug. Check for heavy carbon, wet fuel fouling, oil fouling, or a damaged electrode.
- Inspect the plug gap. Compare it to the specification in your owner’s or service manual.
- Replace the plug if it looks questionable. Spark plugs are inexpensive and often worth replacing during diagnosis.
- Check for spark. Reconnect the plug to the cap, ground it properly against the engine, and crank briefly to look for spark.
- Inspect the plug cap and wire. Cracks, looseness, or corrosion can weaken spark delivery.
- If there is no spark, move upstream. The issue may involve the ignition coil, CDI or ECU, stator, kill switch circuit, or related wiring.
Air Intake or Flooding Issues
Tools/parts needed: Air filter cleaner or replacement filter, clean rags, screwdriver, owner’s manual
- Inspect the air filter. If it is soaked, packed with mud, or disintegrating, airflow may be too restricted for starting.
- Check the intake path. Make sure there is no debris, rodent nesting, or blockage in the airbox or snorkel.
- If flooded, pause before retrying. Repeated cranking with choke can overfuel the engine.
- Open the throttle slightly if your manual allows it. Some models clear flooding better this way, but always follow manufacturer procedure.
- Remove and dry or replace a wet spark plug. A fuel-soaked plug often will not fire reliably.
- Reinstall a clean filter and retry with the correct choke procedure. Over-choking is a common cold-start mistake.
Safety Switch, Starter Solenoid, or Starter Motor Fault
Tools/parts needed: Multimeter, test light, basic hand tools, replacement solenoid or starter if needed
- Verify the kill switch position. This is simple, but easy to overlook during trail prep or rushed starts.
- Confirm neutral, brake, or clutch requirements. Some ATVs will not crank unless a specific condition is met.
- Listen for the solenoid click. A click with no crank can indicate weak battery power, bad high-current connections, or a failing starter.
- Test for voltage at the solenoid and starter. This helps separate control-circuit problems from starter-motor problems.
- Inspect the starter cables. Heat damage, corrosion, or looseness can stop current flow.
- Replace the solenoid or starter only after testing. We recommend avoiding guesswork here because these parts are often replaced unnecessarily.
When to Call a Pro
There is a point where further DIY diagnosis stops being efficient or safe. We recommend calling a professional if any of these apply:
- You smell fuel strongly or see fuel leaking. That is a fire hazard and should be handled carefully.
- You suspect internal engine damage. Grinding noises, seized cranking, or metallic clunks go beyond basic starting diagnosis.
- Electrical testing points to stator, ECU, CDI, or harness faults. These often require model-specific procedures and specialty tools.
- The ATV is still under warranty. Opening certain components or making undocumented repairs could complicate coverage.
- You have repeated no-starts after replacing obvious items. If a fresh battery, plug, and fuel do not solve it, deeper diagnostics are usually needed.
- You are not comfortable working around electrical or fuel systems. There is no downside to protecting your safety and the machine.
A good shop should be able to perform battery load testing, charging-system checks, fuel-pressure testing on EFI models, and ignition-system diagnosis much faster than trial-and-error part swapping.
Frequently Asked Questions
Why does my ATV click but not start?
A clicking sound usually means the solenoid is trying to engage, but the starter is not turning the engine. In our research, the most common reasons are a weak battery, corroded terminals, poor ground connection, or a failing starter motor.
Why does my ATV crank but not fire up?
If it cranks normally but never starts, focus on the three basics: fuel, spark, and air. Start with fresh fuel, inspect the spark plug, and check for a clogged air filter or flooding.
Can stale gas really stop an ATV from starting?
Yes. Fuel that sits too long can lose volatility and leave varnish deposits in the carburetor or fuel system. That is especially common after off-season storage.
Should I replace the spark plug first?
Often, yes. A spark plug is inexpensive, easy to inspect, and commonly involved in hard-start and no-start problems. We recommend checking gap and condition at minimum.
How do I know if the battery is bad or just discharged?
Charge it fully, then test voltage and cranking performance. If it loses charge quickly, drops excessively under load, or is several years old, replacement is often justified.
A no-start issue can feel frustrating, but most cases become manageable once we separate the symptom from the cause. Work from the simplest checks outward: battery, connections, fuel, spark, air, and interlocks. That method saves time, avoids unnecessary parts, and gets your machine back to what matters most—reaching the trailhead reliably.
Get our best guides in your inbox
Recommended Tools & Parts