ATV Trail Riding Safety: Pre-Ride Checklist

Alana Azzouz is a Senior Editor at Searchshop Media Network with over a decade of experience in consumer content quality and editorial standards. She has reviewed thousands of product guides, buying articles, and comp…
Why trust us
BestATVTrails trail guides are researched by riders with decades of powersports experience. Our lead researcher spent 30+ years in powersports retail and has ridden trails across a dozen US states. Every gear recommendation is sourced from real product research matched to specific terrain — not paid placements or generic affiliate lists.
🛠 What you'll need
-
 Check Price on Amazon →Peicees 13PCS Motorcycle Set, 5 Dirt Bike Ski Goggles UV Protection Dustproof Windproof Safety Glasses with 8 Skull Face Mask$27.99★★★★☆ (361)
ATV Trail Riding Safety: Pre-Ride Checklist
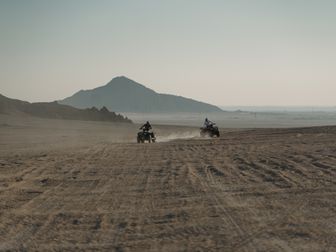
If you want a simple ATV trail riding safety pre ride checklist you can actually use before every trip, start here. We put this guide together for trail riders who want a repeatable routine that helps prevent breakdowns, reduce risk, and make every ride smoother. A few minutes in the driveway can save hours on the trail, especially when terrain, weather, and remote access all work against you.
The ATV Trail Riding Safety Pre-Ride Checklist

1. Confirm Your Riding Plan
Before touching the ATV, we recommend starting with the ride itself.
Ask:
- Where are we riding?
- What is the weather forecast?
- How remote is the trail system?
- Are permits, passes, or spark arrestor rules required?
- Who knows where we’re going and when we’ll return?
This step matters because trail conditions change fast. Mud, water crossings, heat, cold, and elevation all affect what gear and supplies we should bring.
2. Put On the Right Protective Gear
Never treat gear as optional. At a minimum, we recommend:
- DOT-approved helmet
- Eye protection or goggles
- Full-finger gloves
- Over-the-ankle boots
- Long sleeves and durable pants
- Chest protector or armored jacket for rougher terrain
Recommended Riding Gear on Amazon
| Rank | Product | Type | Approx. Price | Best For |
|---|---|---|---|---|
| 1 | Bell Qualifier Full-Face Helmet | Helmet | $120-$170 | Riders wanting strong value and full-face protection |
| 2 | Fox Racing Main Goggles | Goggles | $25-$40 | Budget-friendly eye protection for trail dust and debris |
| 3 | Alpinestars Tech 3 Boots | Riding Boots | $230-$300 | Riders who want serious lower-leg and ankle support |
| 4 | Mechanix Wear Original Gloves | Gloves | $20-$35 | General trail riders wanting affordable grip and comfort |
1. Bell Qualifier Full-Face Helmet
Pros
- Good value for a known brand
- Full-face coverage for trail riding
- Multiple venting points
- Widely available sizes and graphics
Cons
- Heavier than some premium helmets
- May feel warm in slow technical riding
Who It’s For
We recommend it for riders who want dependable full-face protection without jumping into premium helmet pricing.
2. Fox Racing Main Goggles
Pros
- Affordable
- Good visibility for trail use
- Easy upgrade from basic eyewear
Cons
- Basic lens features compared with premium options
- Foam quality is more entry-level
Who It’s For
This is a smart pick for casual and intermediate trail riders who need reliable dust and roost protection at a low cost.
3. Alpinestars Tech 3 Boots
Pros
- Strong ankle and shin protection
- Better support than work boots
- Reputable off-road brand
Cons
- Expensive compared with casual riding footwear
- Break-in period may be needed
Who It’s For
We recommend these for riders tackling rough trails, rocky terrain, or longer days where support and protection matter more.
4. Mechanix Wear Original Gloves
Pros
- Affordable and easy to find
- Good grip and basic hand protection
- Comfortable for general trail use
Cons
- Not a dedicated motocross glove
- Less knuckle protection than armored options
Who It’s For
These are best for riders who want simple, low-cost gloves for recreational trail riding and utility use.
3. Check Tires and Wheels
Tires are one of the most important parts of pre-ride safety.
Inspect:
- Tire pressure on all four tires
- Cuts, punctures, dry rot, or sidewall damage
- Tread wear and uneven wear patterns
- Lug nuts for tightness
- Wheels for bends or cracks
Use the pressure range recommended in your owner’s manual. Too much pressure can reduce traction and make the ride harsh. Too little can increase the chance of a flat or bead issue.
4. Inspect Brakes and Controls
Before riding, squeeze and press every control.
Check:
- Front and rear brake function
- Brake fluid level if applicable
- Parking brake operation
- Throttle movement and return
- Steering for smooth movement and no binding
If the throttle sticks or the brakes feel soft, do not ride until the issue is fixed.
5. Check Fluids and Fuel
A quick fluid check can prevent overheating and engine damage.
Look at:
- Fuel level
- Engine oil level
- Coolant level if your ATV is liquid-cooled
- Brake fluid
- Signs of leaks under the machine
We recommend topping off before loading up or leaving home instead of assuming fuel on the route will be available.
6. Inspect the Battery and Electrical System
Electrical issues can leave you stranded just as quickly as a flat tire.
Check:
- Battery terminals for corrosion or looseness
- Headlights and taillights
- Brake light if equipped
- Winch power and remote function if installed
- Accessory wiring for loose connections
If your ATV has sat for a while, make sure it starts cleanly and idles normally before heading out.
7. Look Over the Drivetrain and Suspension
Trail vibration loosens hardware over time, so this step is worth a close look.
Inspect:
- Axles and CV boots for tears or grease leaks
- Chain or drive components if your model uses them
- Shocks for leaks or damage
- A-arms and suspension hardware
- Skid plates for loose mounting points
Listen for clunks, pops, or grinding when rolling the ATV a short distance.
8. Secure Cargo and Recovery Gear
Loose cargo is both a safety issue and a trail nuisance. Pack only what you need, but make sure critical items are with you.
We recommend carrying:
- Water
- Snacks
- First-aid kit
- Tool kit
- Tire repair supplies
- Tow strap
- Winch accessories if equipped
- Phone or radio
- Trail map or GPS
Secure everything to racks or inside storage so it does not shift on climbs, descents, or off-camber sections.
9. Bring Smart Trail Recovery Essentials
For riders building out a trail kit, these Amazon-available recovery items are worth considering.
| Product | Type | Approx. Price | Why We Recommend It |
|---|---|---|---|
| Tusk Tire Repair Kit | Tire repair kit | $25-$40 | Compact and useful for common punctures |
| WARN Epic Tree Trunk Protector | Recovery gear | $30-$50 | Helps with safer winching setups |
| SuperATV 1.5" Tow Strap | Tow strap | $20-$35 | Good basic recovery item for trail groups |
| ARB Speedy Seal Repair Kit | Tire repair kit | $45-$65 | More complete option for riders covering remote miles |
10. Do a Final Start-Up Walkaround
Once everything checks out, start the ATV and do one last pass.
Confirm:
- No warning lights or unusual sounds
- Lights work
- Brakes engage properly
- Handlebars turn freely
- Cargo is strapped down
- Helmet strap is secured
- Phone or GPS is charged
This final minute often catches the little things people forget.
Why a Pre-Ride Checklist Matters
ATV trail riding is hard on both rider and machine. Loose bolts, low tire pressure, worn brakes, or forgotten safety gear can turn a fun day into a recovery mission. We recommend doing the same basic inspection before every ride, even if you were out just last weekend.
A good pre-ride routine helps us:
- Catch mechanical issues early
- Pack the right gear for trail conditions
- Improve comfort and control on rough terrain
- Reduce the chance of getting stranded
- Ride more confidently with a clear plan
Gear and Materials You’ll Need

Before starting the checklist, gather a few basics:
- Owner’s manual
- Tire pressure gauge
- Air source or portable compressor
- Clean rag or shop towels
- Basic tool kit
- Flashlight or headlamp
- Chain lube if your ATV requires it
- Fuel if topping off is needed
- First-aid kit
- Helmet, goggles, gloves, boots, and protective riding gear
- Phone, GPS, or trail map
Safety Notes Before You Begin
Before we get into the step-by-step process, keep these safety reminders in mind:
- Always inspect your ATV on level ground.
- Let the engine cool before checking fluids near hot components.
- Never assume a previous ride means the machine is still trail-ready.
- If anything feels unsafe during inspection, fix it before riding.
- Ride within your skill level and local trail rules.
A Simple Pre-Ride Routine We Recommend
If you want a quick repeatable habit, use this order every time:
- Check the ride plan and weather
- Put out all riding gear
- Inspect tires and wheels
- Check brakes and controls
- Check fuel and fluids
- Inspect battery and lights
- Look over suspension and drivetrain
- Pack tools, water, and recovery gear
- Start the ATV and do a final walkaround
- Tell someone your route and ETA
Common Pre-Ride Mistakes to Avoid
Even experienced riders skip basics. We recommend avoiding these common mistakes:
Assuming Last Ride’s Fuel Is Enough
Trail mileage changes with terrain, mud, and throttle use. Start full when possible.
Ignoring Tire Pressure
ATV handling changes dramatically with incorrect pressure. A visual check is not enough.
Wearing Work Boots Instead of Riding Boots
Better than sneakers, yes, but dedicated riding boots provide much better support and impact protection.
Forgetting Communication
A fully fueled ATV does not help if nobody knows where you are.
Packing Gear Loosely
Unsecured cargo can shift, fall off, or interfere with riding position.
FAQ
Get our best guides in your inbox
How long should an ATV pre-ride inspection take?
For most riders, a basic pre-ride inspection takes about 10 to 15 minutes. If the ATV has been sitting for a while, allow extra time.
What is the most important item on an ATV pre-ride checklist?
If we had to narrow it down, tires and brakes are at the top. They directly affect control, stopping, and stability on the trail.
Should we check tire pressure before every trail ride?
Yes. Tire pressure can change with temperature, storage time, and slow leaks. A gauge check is quick and worth it.
What safety gear is essential for ATV trail riding?
At minimum, wear a helmet, eye protection, gloves, long sleeves, long pants, and over-the-ankle boots. We also recommend chest and impact protection for rougher trails.
What should we carry in case of a trail breakdown?
Bring a tool kit, first-aid kit, water, phone or radio, tow strap, and tire repair kit. For remote rides, a winch setup and GPS are also smart additions.
Final Thoughts
A consistent pre-ride routine is one of the easiest ways to improve trail safety. This checklist is not complicated, but it covers the things that matter most: rider protection, machine condition, and trail readiness. We recommend saving this guide, turning it into a printed checklist, and using it before every ride so safe habits become automatic.
When the ATV, gear, and route all get a quick review before departure, the trail day usually goes better from start to finish.